The first few hours following water damage are critical. Your prompt response can minimize damage, prevent health risks such as mold, and avoid costly restoration.
Safety, assessment, and documentation are your priorities. Water moves and spreads, and it’s easy to underestimate the extent of a loss until walls are opened and framing and subtle floor slopes become evident. Contact Water Damage Restoration Salt Lake City for more details.
1. Turn Off the Water
Whether caused by a burst pipe, a ceiling leak, or sudden flooding from Miami’s tropical storms, water damage moves quickly and can be devastating. The first 24 hours are the most critical for minimizing damages, preventing mold growth, and avoiding costly repairs. This step-by-step guide walks you through immediate actions that can save you thousands in water restoration costs.
Shut off the water at the source if possible. If the water is near electrical outlets or appliances, shut off power to prevent potential electrical hazards. If your property has Category 2 or Category 3 water (contaminated with bacteria, chemicals, or sewage), do not attempt to cleanup on your own.
Move valuables and furniture to a dry area. If it’s safe, use a wet/dry vacuum or towels to remove excess water and speed up drying. Open windows and doors to increase airflow if weather permits. Dehumidifiers and fans help pull moisture from the air to reduce damage and speed up the process. Moisture that is not removed will continue to penetrate into walls, floors, and insulation, leading to structural deterioration and mold growth.
2. Turn Off the Power
Water damage can cause a variety of hazards. The most dangerous is the risk of electrical shock and fires. This is because water conducts electricity, which means that if there’s a break in the line outside of your house or a wet floor inside, the current could travel to outlets and switches. It can also corrode metal components, increasing the risk of short circuits and fires.
This is why it’s so important to shut off the power as soon as possible. You can do this by going to your breaker box and turning off the power to the affected area. If you can’t safely access the breaker box, call emergency services.
Once the power is turned off, it’s important to look for signs of water damage and evacuate the area if needed. Look for a fishy or burning smell, discolored outlets and switches, or sagging ceilings. If you spot any of these, shut off the power again and call a professional immediately. They’ll be able to assess the damage and start the drying process quickly.
3. Evacuate the Area
Water damage is a disaster that can happen from many sources. A burst pipe, heavy rain, appliance failure, or even sewage backup can cause flooding. No matter what caused it, the first 24 hours are critical to reducing long-term damage, avoiding mold growth, and minimizing repair costs.
If you are in an area susceptible to flooding, make sure that you keep up with local news and obey any evacuation orders. Six inches of moving floodwater can knock you off your feet and float your car, so be careful!
Do not enter flooded areas, unless you are certain that the electricity has been turned off and that it is safe. If you must enter, wear water-tight gloves and boots to protect yourself from bacteria or chemicals. Also, never wade in floodwater if it is brown or murky; this water may contain dangerous pathogens. If possible, remove items that have been soaked with water (such as furniture, carpets, and other possessions) and place them outdoors to hose off, dry, and sanitize. Plastic, metal, and solid wood furniture can be saved if they are dried out and sanitized within a few days of the flood.
4. Remove Water-Saturated Items
Whether your home is affected by a burst pipe, heavy rainfall, or appliance failure, the first 24 hours are critical for minimizing water damage, preventing mold, and protecting your structure. Taking action quickly can save thousands in repairs and restoration costs.
Moisture infiltrates and ruins organic materials like wood, drywall, carpeting, and insulation. It also creates the ideal conditions for mold, which can begin forming in 24-48 hours. Professional moisture detection, water extraction, and thorough drying prevent mold and rot from forming.
Immediate response is important, but professional water restoration is essential for preventing long-term problems. While these water damage steps provide a foundation for homeowner response, professionals have the equipment, experience, and technology to effectively dry all materials and structures. They can also ensure all contaminants are removed, restoring your property to its pre-damage condition.
5. Take Photos and Videos
Taking action during the first 24 hours after water damage is essential. This can help reduce damage, prevent mold growth, and save on costly repairs. It can also minimize health risks and structural damage. Whether water damage occurs from flooding, a burst pipe, or sudden storms in Baldwin’s humid climate, the right steps can make all the difference.
Documentation is vital to a successful insurance claim, so take clear photos of all the affected areas. This includes walls, floors, furniture, and valuables. It’s also a good idea to create a detailed inventory of damaged items with their serial numbers, brand names, and model numbers.
If possible, take video walks through the affected areas while narrating what you see. This can help provide context that photos alone cannot. It’s also a great way to show your insurance company what steps you’ve taken to mitigate damage and prevent further damage. This can significantly impact your eligibility for an insurance payout. It can also help speed up the process of restoring your home to normal.
6. Document the Damage
Documentation is a critical component of the water damage restoration process. Thorough documentation allows property owners to protect their financial interests, support insurance claims, and facilitate proper restoration protocols.
It is especially important to document the damage caused by sudden or catastrophic events such as a burst pipe, a flooded basement, or storm flooding. This step can save you a lot of trouble in the long run by preventing further structural damage, increased repair costs, and health risks.
In addition to documenting the extent of the water intrusion and damage to personal belongings, property owners should also take clear photographs of the source of the water, including close-ups of specific failure points and wider shots of the affected areas. It is also a good idea to freeze valuable documents, such as photographs and books, to slow down early mildew growth.
Water damage is categorized into three distinct types according to its contamination level, which can significantly impact the cleanup and restoration process. Detailed records must be provided for Clean Water (from sanitary sources), Gray Water (with moderate contamination), and Black Water (from severe contamination such as sewage backups or flood waters). These details allow insurance providers and restoration professionals to assess the risk of secondary damage, identify potential safety hazards, and develop appropriate remediation strategies.
7. Contact Your Insurance Company
If your home is affected by water damage, it’s important to contact your insurance company immediately. Promptly reporting the damage can help speed up the process of filing an insurance claim and may allow you to receive a higher payout. It’s also essential to understand your policy and take clear photos of the water damage.
Water damage restoration is more than just removing visible water and drying surfaces, and it requires professional training and equipment. It involves identifying the source of the water, inspecting for additional damage, thoroughly drying and disinfecting surfaces, preventing mold growth, and repairing or rebuilding any structures that were damaged.
The first 24 hours after noticing water damage are critical for minimizing damage, preventing mold growth, and protecting your home’s structural integrity. Moisture spreads rapidly through porous materials like drywall and wood, and mold starts growing in 24-48 hours under the right conditions. Water damage can also affect electrical systems and lead to unsafe conditions, especially in Florida’s high humidity. It’s also important to know whether your insurance company has a vacancy clause, which excludes coverage if your house is unoccupied for an extended period.
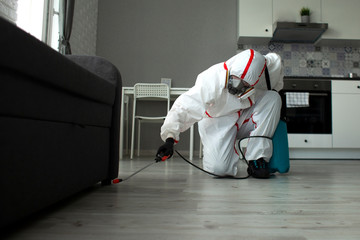
8. Call a Professional
Regardless of the severity of your water damage, a certified team is needed to assess and dry the affected area. This step is vital for preventing long-term problems like mold growth and structural deterioration.
Professionals use wet/dry vacuums, pumps, and dehumidifiers to extract standing water. They also employ moisture meters to check for hidden moisture in walls and other hard-to-reach areas. Moisture is what causes the structural deterioration that leads to expensive repairs down the line. Professionals are also trained to recognize the warning signs of potential problems and can prevent them from getting worse.
Thorough documentation is the key to a successful insurance claim. Make a list of all damaged items and take clear photos of all visible damage from multiple angles. It’s also a good idea to record a video walkthrough of all affected areas while narrating what you see. This gives context that photos alone cannot provide. This early documentation will help you save time, money, and stress later on.